|
|
楼主 |
发表于 2024-5-15 14:17:12
|
显示全部楼层
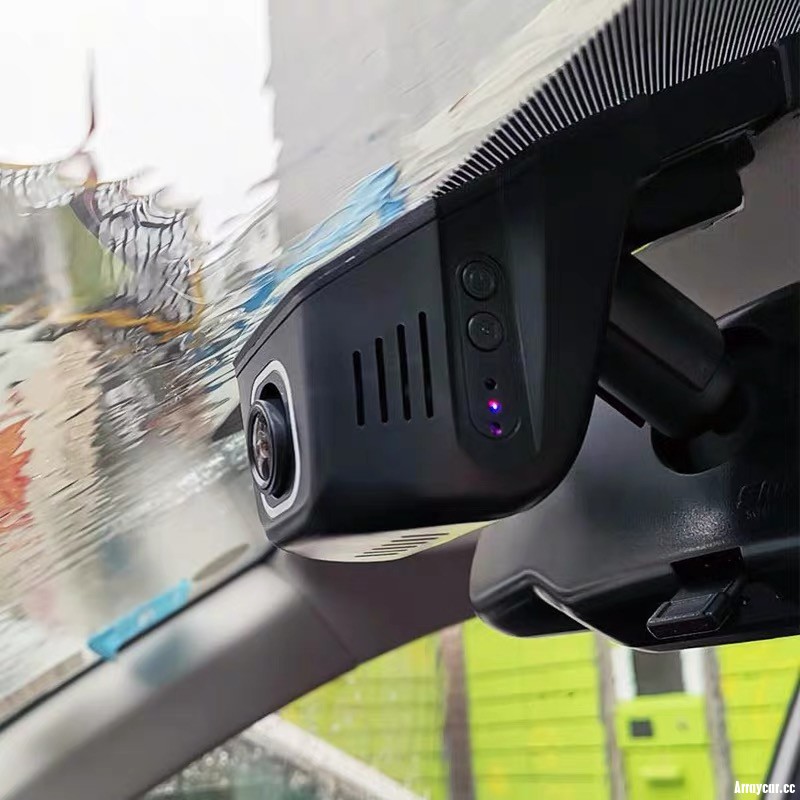
After determining the installation position and wiring plan of the driving recorder, the first step is to insert the power cord of the recorder into the gap on the roof. Then, pull down the door frame seal and use both hands to push open the A-pillar decorative panel. Most of the A-pillar decorative panels are fixed with buckles, and the first disassembly will be quite tight, so there is no need to be afraid of using some force.
The purpose of disassembling the A-pillar decorative panel is not to insert the wires into the A-pillar. Because many car models have side air curtains, they are afraid of safety concerns, just to ensure the smooth passage of the power cord. Then, insert the wire into the door frame sealing strip, align it with the A-pillar buckle, and gently tap in the A-pillar decorative panel with your fist.
5. Install a sealing strip from the top of the A-pillar downwards along the door frame, and insert the power cord into the sealing strip until the line is thrown out from the bottom of the dashboard. Then, you can test your waist.
6. Thread the power cord through the back of the glove box. According to the actual situation of different models, the flexible cable can be fixed behind the glove box or hidden under the firewall or glue. Although this step may be a bit cumbersome, the visual effect will be the best.
7. In order to avoid seeing too many open wires near the cigarette lighter, screw in the decorative panel screws at the bottom of the center console, create a small gap, insert the wires into the gap, and then tighten the screws. However, there are many models that require flexibility.
8. Plug in the power supply of the cigarette lighter, confirm that the driving recorder can be powered on and started normally, and then complete the installation and wiring.
The installation process and precautions of the driving recorder

If friends who are not familiar with the interior structure of the car rashly install a dash cam circuit in the airbag area, it is likely to change its original device, affecting the normal operation of the airbag. Similarly, the in car circuits are also complex compared to the same period last year. If you are not familiar with the circuit, we do not encourage you to modify the circuit route and drive the recorder to power it on your own.
The above are all about the installation process and precautions of the driving recorder. Bian Xiao Auto has provided a brief introduction, hoping to solve the problem for friends.
I don't think installing a dash cam is that complicated. We just need to install it with care, the key is here. These are the best positions behind the rearview mirror. Insert wires along the gaps inside the car; The wire is plugged under the rubber soundproof strip of the car door decoration; Thread the wire through the foot mat and then insert it into the cigarette lighter plug. Alright, that concludes the installation process and precautions for the dash cam.
First test the driving recorder, then find the installation point and follow the route. Try to pay attention to hidden lines when routing to avoid affecting aesthetics.
Specific installation steps: 1. Firstly, the driving recorder needs to be powered on. Note that the battery capacity of the dash cam is small. It is very likely that the newly purchased one runs out of battery and may need to be connected to the power cord before it can be turned on. Generally, when the dash cam is turned on, the SD card will automatically recognize and format it.
2. Test basic functions, automatic shooting, photography, playback, and other common functions after startup. After confirming that the machine is functioning properly, you should start the installation. Firstly, it is necessary to clarify the installation point of the driving recorder, which is usually installed behind a mirror and will not affect the driver's perspective.
3. It is best for the installation personnel to sit on the driver's seat of the main frame for easy angle adjustment. In addition to not obstructing the driver's line of sight, the height and angle should be able to capture the road ahead. You can observe the image on the dash cam screen and see if the middle of the road is centered to help determine.
After adjusting the driving recorder, use a suction cup to suck it onto the front windshield. If it doesn't stick, sprinkle a little water on the inside of the windshield.
Installation steps and precautions for driving a dash cam
5. First, line up along the inverted rearview mirror, pass through the front passenger's sunshade, and walk to the side of the car. A wiring duct is reserved for ordinary cars at the upper right A-pillar of the front passenger. Gently pry open the conduit with a plastic rod, bury the cable, and then extend the line downwards from the black conduit in the corner to the bottom of the air conditioner.
Finally, after connecting the cable to the cigarette lighter, the manual work is completed. At this point, you can go for a spin. Note that the recorder should automatically turn on and start shooting when the car is ignited, and the car should be configured to automatically turn off when turned off. Confirm that the shooting is normal, the image is clear, and the installation is complete.
|
|
 |Archiver|小黑屋|深圳车品矩阵科技有限公司
( 粤ICP备2024242407 )